Cook the Collection #9: Better Homes & Gardens Cookies Cookies Cookies
Posted on April 21, 2014 by Meghan
Better Homes and Gardens Cookies Cookies Cookies is an older cookbook (published in 1992) which is a bit of a novelty book – half of the book is called “Any – Day Treats” with basic recipes for peanut butter cookies and snickerdoodles and when you flip the book over and turn it upside down you have “Christmastime Treats” with more elaborate shaped and decorated cookie recipes. It’s a pretty no-nonsense book generally, with spare header notes and straightforward, easy-to-follow directions. I’ve had this book for 20 years and I don’t know that I’ve ever baked anything from it before (why do I hold on to these books? It’s crazy, I know).
My little guy wanted to bake Chocolate Chip Cookies the other day and instead of just using the recipe off the back of the chip bag like I usually do, I pulled out this book to give it a try. The ingredient list was pretty much what I was expecting except that it called for a half cup of vegetable shortening – which I don’t usually keep on hand and didn’t want to buy just for these cookies. What I did have in the pantry was a jar of coconut oil so I substituted it with a 1:1 ratio. It ended up giving the cookies a subtle coconut flavor, but I thought it was quite a nice addition. After baking these cookies I’ll probably give another recipe from this book a try since the one I tested was easy and successful.
(Disclosure: The cookbook link in this post is an affiliate link and if you happen to make a purchase via the link I’ll receive a small percentage of your purchase – and of course would be so grateful!)
Keep Your Dog Off the Counter (In One Easy Step)
Posted on April 17, 2014 by Meghan
Okay folks, if you’ve got a reasonable sized dog with longish legs who likes to, shall we say, counter surf, then this post is for you. We’ve got one of those kinds of dogs and I was starting to go a little crazy with his grazing ways. This dog couldn’t pass through the kitchen (and its basically a galley kitchen, so there’s a lot of passing through going on) without putting his front paws up onto the counters or the edge of the sink to see if there was anything to eat. Of course, there usually is because with little kids there’s always some food either being prepared, waiting to be served, or abandoned half-eaten at any given time. We tried correcting him with a gentle ‘no’, with a forceful ‘no’, with a loud noise (meant to startle him – yeah right), with a squirt of water (uh, he’s a hunting dog so he likes water) . . . nothing worked. Finally we tried this method to keep the dog off the kitchen counters. Get ready, you might want to take notes, it’s pretty detailed:
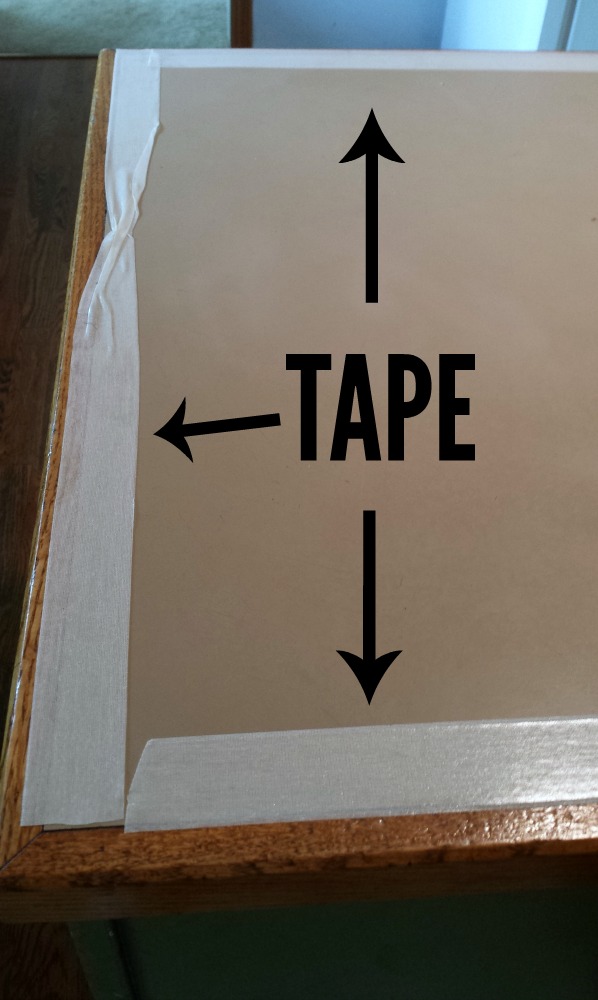
Step 1: Put double sided carpet tape around the edges of your counters and sink.
Step 2: That’s it! there is no step 2. You’re done now. Here’s a visual aid in case you need a bit more information:
The first day of Operation Counter Tape we set up an experiment – a nice big cookie right in the middle of the counter. Poor Pisco tried one side of the counter, then the other side, then the third side and each time he got right back down again his paws stuck to the tape. The tape is pretty sticky, but not enough to actually hurt when you’re stuck to it and it’s easy to pull off of. The cookie stayed right there for an hour or so, until my son ate it (Note: counter tape does not appear to deter children at all). We also put a strip of tape along the front of the sink and that kept him from jumping up to lick dirty dishes. It’s been two weeks now and he does still occasionally try the counter but gets down again before he grabs anything. I think we’ll need another week or so before we can officially say the counter surfing problem is solved.
There are a few things to keep in mind: 1) You’ll need to pull off and redo the tape occasionally depending on how often the dog, kids, dishtowels, your own clothing etc get stuck to it so that it stays sticky; 2) We have crappy linoleum counter-tops and although the tape comes off easily without a residue, I’d be a bit wary of using it on higher end surfaces – at least test it out in a small inconspicuous area first; and 3) You’ll need to keep the tape up until the dog completely stops jumping up because if she jumps up after the tape’s gone she’ll be right back to that counter surfing habit in no time.
Good luck, and come back and let me know if this method does (or doesn’t) work for you!
Dinner Prep with a New Mandolin
Posted on March 14, 2014 by Meghan
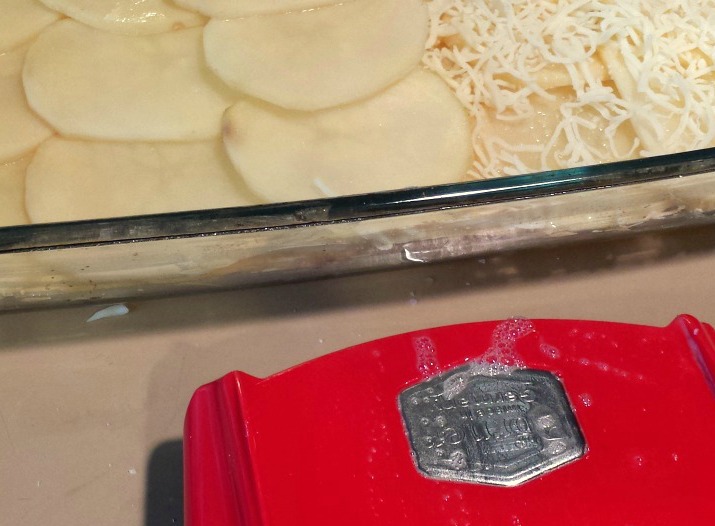
I got a shiny new mandolin as a gift awhile back, and up until now I’ve been a bit nervous to use it – I’ve heard so many horror stories about slicing off bits of fingers along with paper thin potatoes – but I wanted to make a potato gratin and the mandolin was there, just waiting for me to grab it. After I skimmed the user’s manual (deceptively thick, it had instructions in 16 languages) I peeled four potatoes and away I went. Wow – this thing slices so easily I was through those potatoes in like a minute, and the finger guard worked great so I avoided giving myself a trim. I put about three layers of potato slices in a pan with a sprinkle of mozzarella cheese in between each layer, and added milk up to the top of the potatoes, covered the whole thing with aluminum foil and into the oven. Easiest potato gratin ever – and we all loved it, even the little guy once we convinced him to give it a try.

It turns out that the mandolin sliced the potatoes so quickly, easily and uniformly that I decided to use it on a red onion as well, to put in the roasting pan under a pork tenderloin. I just chopped the root end off, peeled the onion and sliced it up, in a fraction of the time it would have taken me with a knife. The next time I make up a batch of caramelized onions (one of my favorite things) it’ll be such a breeze. Suddenly I want to slice everything with the mandolin! I wish I’d have overcome my fear sooner – what a time saver in the kitchen.
(Disclosure: The post above contains an affiliate link and if you happen to make a purchase through it I’ll receive a small commission)
Cook the Collection #8: Falling Cloudberries
Posted on March 5, 2014 by Meghan
 (Disclosure: The cookbook links below are affiliate links and if you happen to make a purchase through them I’ll receive a small commission)
Time to get back on the ball with the cookbook challenge – at this rate I’ll never get though them all – especially since I’ve acquired more since I started. Most recently I baked from the intriguing cookbook Falling Cloudberries: A World of Family Recipes by Tessa Kiros. This is a lovely book to read, full of family stories and remembrances of grandparents, in-laws and family friends. Its a very eclectic collection of recipes, drawing from around the world with just the unifying theme of the author’s family, but it works, especially when you read the headnotes of each recipe. There’s something in that eclectic mix that reminds me of how our family eats, drawing our culinary influences both from family recipes and the world around us.
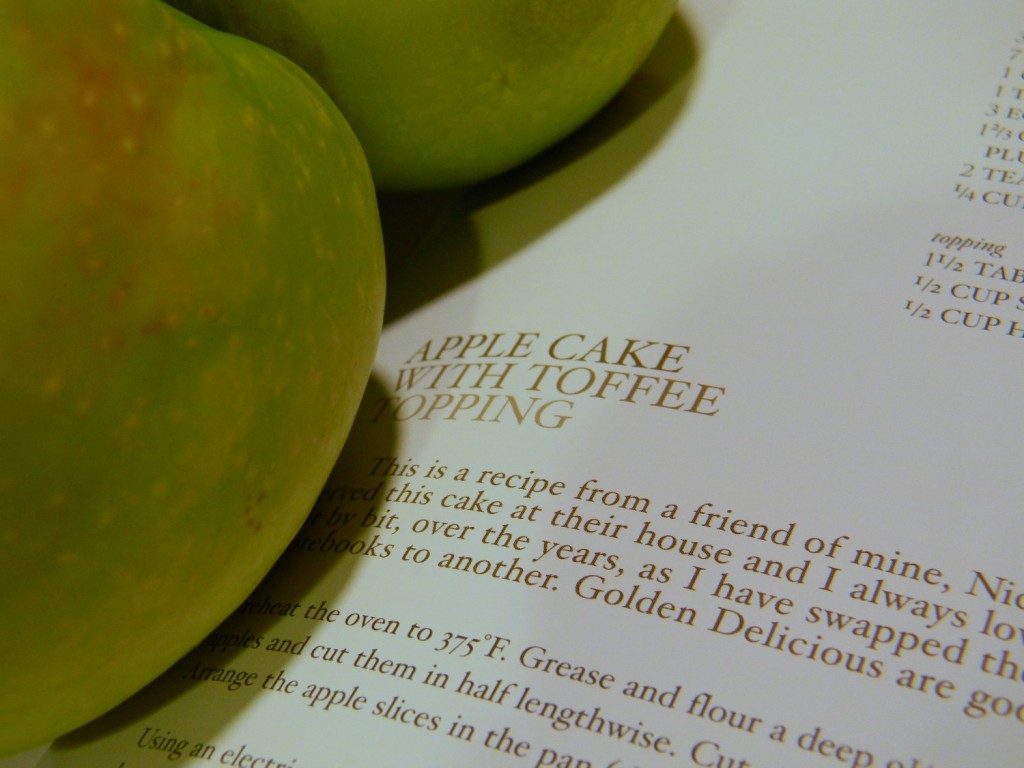
I baked Apple Cake with Toffee Topping and it turned out delicious – good apple flavor with a yummy caramel toffee topping. The recipe was straightforward and easy to follow but the best part for me was the way it got the gears turning in my mind. For me, the best recipes get you thinking as you make them and eat them; I was quite inspired by this recipe and can’t wait to work on my own variations.
French Onion Tortellini Soup Made with Only Four Ingredients
Posted on January 14, 2014 by Meghan
On cold, rainy dreary winter days I love to have a pot of soup on the stove. There’s something about soup simmering that feels so homey to me. Here’s a quick and easy soup my family loves – French Onion Tortellini Soup. This soup is so fast to prepare if you’ve got the ingredients on hand in your fridge. Its really satisfying to be able to get a homemade soup to the table on a weeknight with a minimum of effort and a minimum of ingredients. I like to serve this with a baguette or rolls and a salad on side, and it’s also great with a leafy green added in – spinach, kale and chard all work great.
French Onion Tortellini Soup
Serves 6
Ingredients
1 pound mild Italian sausage
1 large yellow onion, sliced thinly
1 quart beef stock
16 oz. Tortellini (I use the cheese tortellini from Costco).
Directions
1. Roll the Italian sausage into small meatballs and cook them in a large dutch oven or stockpot on medium high heat until they are browned all over and almost cooked through. You don’t need any oil in the pot – the sausage will release a lot of fat on its own.
2. Remove the sausage from the pan onto a paper towel lined plate and drain off the fat, leaving just a thin film behind on the bottom of the pot.
3. Saute the onion slices in the pot until they are soft and brown – the more caramelized they are the better.
4. Add the stock to the pot and stir to bring up all the browned bits from the bottom. Then add back the meatballs and the tortellini and cook for about 8 minutes more.
5. Serve and enjoy!
Meatloaf Cupcakes
Posted on January 6, 2014 by Meghan
My daughter has been wanting to make meatloaf cupcakes for awhile now, ever since we saw a picture of them somewhere (probably on Pinterest, right?). Whenever my kids make a dinner request that isn’t complete junk food I try to accommodate them so last night we made up a batch. Now, I didn’t go all out with piping on the mashed potatoes a la frosting on top (and I think while that would add to the presentation it seems more appealing to eat the potatoes on the side). There are some changes I might make next time to make them a little more cupcake-like – a more domed-top, and maybe trying to find a way to get the sides a bit more browned/less steamed, but it was a good dinner and it’s nice to have little pre-portioned serving sizes.
They were easy to make – almost as simple as a regular loaf. I used my go-to meatloaf recipe from The New Best Recipe by Cooks Illustrated – of course as always with a few changes. I had to use beef only instead of a meat mix because the local butcher (which sells an incredible meatloaf mix) was totally crazy this weekend and I walked out without getting anything. Then instead of forming one big loaf I just rolled the mixture into balls and put them into muffin tins. I used metal tins and didn’t prepare them at all (no greasing, etc) and I didn’t have any problems with the cupcakes sticking to the sides or bottoms. One regular meatloaf recipe yielded 11 regular sized cupcakes (and it doesn’t need to be exact – you could end up with 10 bigger cupcakes or 12 smaller ones). If you give this a try, do make sure to put the muffin tins on a cookie sheet in the oven to catch any overflowing fat.
Peace, Love and Light
Posted on January 4, 2014 by Meghan
I finally got a chance to escape my home chaos for a few hours to do something just for me – some sketching and drawing and a bit of blogging too. I started out in the beautiful quiet of the local library ’til the cold chased me out to the local Starbucks. That chill was nothing a few hot teas couldn’t handle.
Introducing Pisco!
Posted on January 2, 2014 by Meghan
I just realized that I’ve not yet introduced you all to the new guy in my life – Pisco the puppy! He’s a German Wirehaired Pointer, born on a farm in Eastern Washington. We got Pisco when he was just a 9 week old bundle of fluff, and now he’s a tall, skinny 6 month old. He’s a big part of the reason I didn’t post much at the end of last year; between him and the four-year-old (and the two of them together) I just didn’t have a lot of quiet time for making things, much less writing about them. Now that he’s a bit older and more calm I’m hoping to get some time to myself again.
Even though he’s been keeping me busy here at home we all love him and he’s the kids’ best buddy. He’s a total lap dog who’s snuggled up with them right now watching a show, and once they’re in bed he’ll come snuggle with one of us.
He loves to get into things he shouldn’t (sleeping on the warm laundry pile is a favorite no-no) but with that face we can’t get too angry.
I mean, look at that. He could get away with murder.
He’s smart as a whip, which is awesome except when its not. We taught him to ring a bell to go outside in about 3 days – he taught himself to open our bedroom door by jumping up and turning the handle in about 30 minutes. He learned to sit right away, but he also learned to identify an unsecured roll of toilet paper in under 15 seconds. He’s great fun though!
Beans and Rice for the New Year
Posted on January 1, 2014 by Meghan
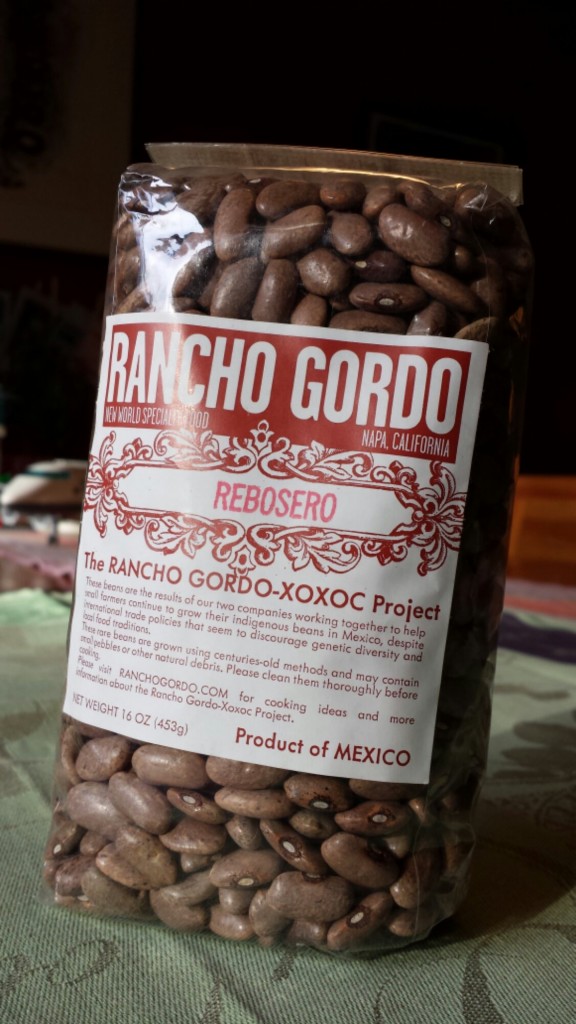
I usually cook black-eyed peas and rice for luck on New Year’s Day, but I never really love it. The peas get mealy and the rice gets mushy when it’s mixed in together, so this year I decided to branch out and make a variation – hopefully it’ll bring luck as well. I used some beautiful Rebosero beans my cousin gave us for Christmas – they cooked up lovely – added some turkey kielbasa and served the rice on the side instead of mixed in. Of course I had to throw a fried egg on top as well.
Advertisement
Sign up here for occasional email updates!
Recent Posts
Archives
- January 2018
- September 2015
- July 2015
- May 2015
- March 2015
- January 2015
- December 2014
- November 2014
- October 2014
- September 2014
- August 2014
- June 2014
- May 2014
- April 2014
- March 2014
- January 2014
- December 2013
- November 2013
- October 2013
- September 2013
- August 2013
- July 2013
- June 2013
- May 2013
- April 2013
- March 2013
- February 2013
- January 2013
- December 2012
- September 2012
- August 2012
- July 2012
- June 2012
- May 2012
- April 2012
- March 2012
- February 2012
- January 2012
Copyright © 2025 · All Rights Reserved · Make Something Daily
Theme: Natural Lite by Organic Themes · RSS Feed · Log in


